
Introduction
Moving day is on the horizon, and you’re surrounded by a mountain of empty cardboard. Does this sound familiar? Learning how to label moving boxes correctly can be the difference between a smooth moving process and a chaotic mess. Imagine arriving at your new home, exhausted, only to spend hours searching for your toothbrush. Proper labeling saves you time, protects your belongings, and makes settling into your new home a much more pleasant experience. Let’s make your move a breeze!
Understanding the Importance of Proper Box Labeling for Moving
Think of proper labeling as creating a roadmap for your move. It’s the secret to transforming a potentially chaotic moving process into an orderly transition to your new location. Without clear labels, you and your moving companies are left guessing, which can lead to confusion and delays. One common mistake is using vague descriptions like “stuff,” making it impossible to know what’s inside.
When you arrive at your new house, the last thing you want is a frustrating game of hide-and-seek with your belongings. Well-labeled moving boxes mean you can direct movers efficiently and find what you need without unpacking every single box. This simple step is your ticket to a less stressful move.
Benefits of Organized Labeling for Easy Unpacking
Organized labeling is your best friend during the unpacking process. When each of your moving boxes clearly states its destination room, you eliminate the guesswork. Movers can place boxes in the correct rooms from the start, saving you the effort of hauling them around later. This makes unpacking faster and far less stressful.
To truly streamline the process, write on multiple sides of the box. This way, you can read the label no matter how the boxes are stacked. You won’t have to shift heavy stacks just to see where a box belongs. This small detail has a huge impact on efficiency.
Furthermore, combining room labels with a numbered master list allows you to prioritize unpacking. You can easily locate the box with your coffee maker for that first morning or the kids’ favorite toys to keep them occupied. This level of organization turns the daunting task of unpacking into a manageable, step-by-step process, helping you settle in much quicker.
Minimizing Lost Items and Reducing Stress During Your Move
The moving process can be emotionally draining, and the fear of lost items only adds to the anxiety. A detailed inventory list paired with a numbered labeling system is your best defense against this. By tracking every box and its contents, you’ll know immediately if something is missing upon arrival at your new home. This system provides peace of mind that everything is accounted for.
For essential or immediate-need items, creating “Open First” or “Priority” boxes is crucial. These boxes should contain things like toiletries, a change of clothes, medications, and basic kitchen supplies. Mark these boxes with brightly colored tape or large, bold labels so they are impossible to miss. This ensures you have access to your necessities from the moment you walk in the door.
Your priority boxes should be the last ones loaded onto the truck and the first ones off. Let your movers know these boxes require extra care and should be placed in an accessible spot. Having these essentials on hand eliminates the frantic search for everyday items and significantly lowers your stress levels on the first day in your new home.
Helping Movers Handle Boxes with Care
Clear labeling isn’t just for you; it’s also a crucial communication tool for your moving companies. When movers can quickly identify where each box goes, they can work more efficiently, placing boxes directly into their designated rooms as they come off the moving truck. This saves time and prevents a pile-up of boxes in one area.
When it comes to fragile items, your labels are a direct instruction for careful handling. Use large, bold letters to write “FRAGILE” on every side of the box. You can also use pre-printed fragile labels or red tape to make these boxes stand out. This visual cue alerts movers that the contents require extra care.
For items that need to stay upright, such as electronics or lamps, be sure to draw arrows or write “THIS SIDE UP” on all sides of the box. This simple instruction prevents items from being turned upside down and potentially damaged during transit. Your movers want to do a good job, and providing them with clear instructions helps them protect your belongings.
Choosing the Best Labeling System for Your Move
Now that you have your supplies, it’s time to choose a labeling system. There’s no single “best” way; the right system depends on the size of your move and your personal preference. The goal is to create a clear, consistent method that simplifies the journey from your old home to your new location.
Whether you opt for a room-based, color-coded, or numbered system, consistency is key. A well-organized approach to labeling your moving boxes will be your secret weapon for a stress-free transition. Let’s look at some popular methods to find the one that works best for you.
Room-Based Labeling for Efficient Sorting
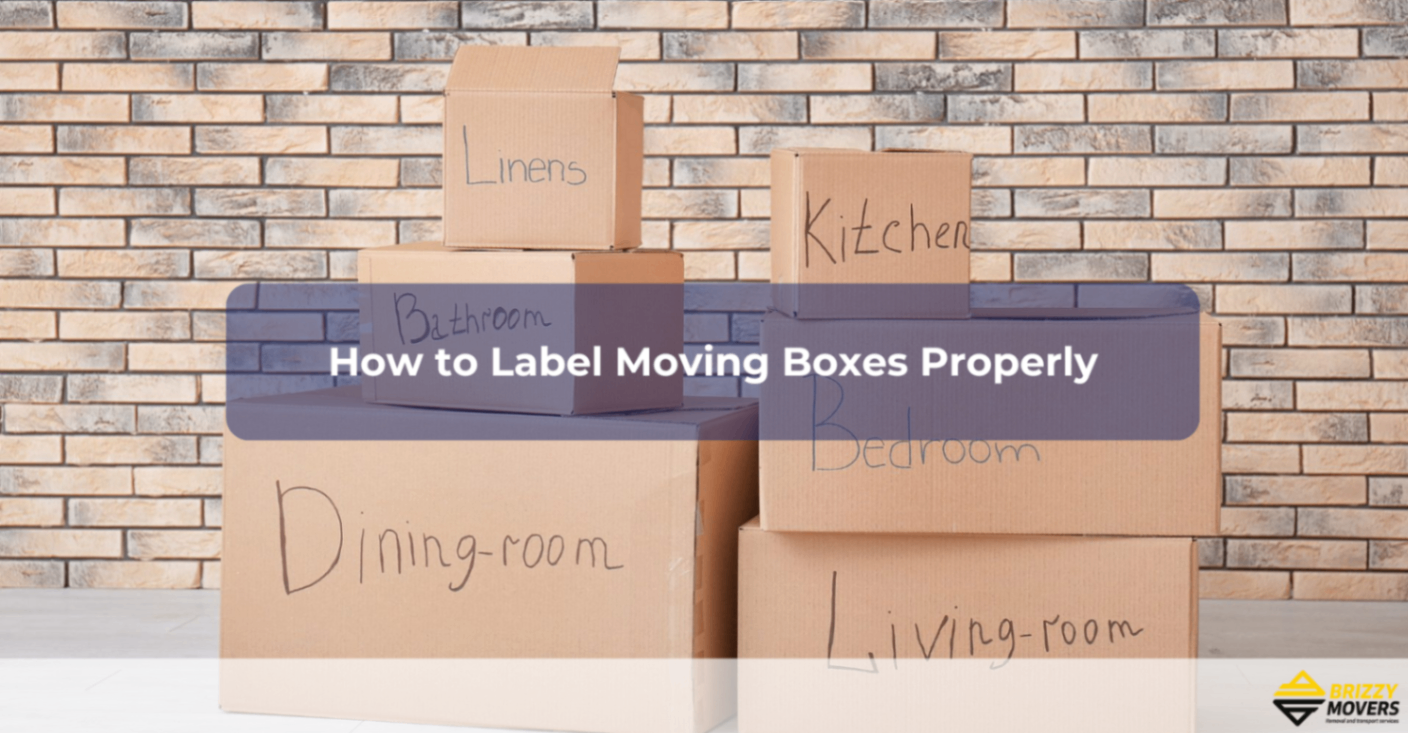
Room-based labeling is one of the most straightforward and effective systems for organizing your move. As the name suggests, you simply label each box with the room it belongs to in your new home. For example, boxes from your kitchen are marked “Kitchen,” and those from your main bedroom are marked “Master Bedroom.”
This method makes sorting incredibly efficient. When the movers arrive, they can see at a glance where each box should go. You can even tape a sign with the room name on each bedroom door to make it even easier. This prevents a massive pile of boxes in your new living room and ensures your kitchen boxes actually make it to the kitchen.
While simple, this system is powerful. It streamlines the unloading process and makes unpacking much more manageable. You can tackle one room at a time, knowing all the corresponding boxes are already in place. For most moves, this system is a fantastic starting point for an organized transition.
Numbering and Inventory Lists for Tracking All Boxes
For those who love precision, a numbering system combined with a master inventory list is the ultimate tool for tracking your belongings. Each box gets a unique number, and you maintain a list—either in a notebook or a digital spreadsheet—that details the contents of every numbered box. This gives you complete control and a bird’s-eye view of your entire move.
This system is perfect for locating specific items without opening multiple boxes. Need your coffee maker on the first morning in your new house? Just check your inventory list to find its box number. It’s also incredibly useful for insurance purposes, as you have a detailed record of your possessions.
You can decide whether to write the contents on the outside of the box or rely solely on your master inventory. A hybrid approach often works best: write the room and box number on the outside and keep the detailed contents on your list for privacy and organization.
|
Box Number |
Destination Room |
Contents |
|---|---|---|
|
Box #01 |
Kitchen |
Pots, pans, baking sheets, cutting boards |
|
Box #02 |
Master Bedroom |
Winter sweaters, scarves, hats, gloves |
|
Box #03 |
Living Room |
Books, board games, photo albums |
|
Box #04 |
Kitchen |
Coffee maker, toaster, blender, utensils |
Color Coding Methods for Quick Identification
Color coding is a fantastic visual method that makes identifying boxes quick and effortless. The idea is to assign a specific color to each room in your new home. You can use colored tape, stickers, or markers to implement this system. It’s a simple trick that dramatically speeds up the moving process.
This system works so well because it requires no reading. Movers and helpers can instantly see which color corresponds to which room. Just place a matching colored sticker or piece of tape on the doorframe of each room in your new place. This visual cue ensures boxes land in the right spot without any confusion, especially for your kitchen boxes and priority boxes.
For an effective color-coding strategy, create a legend and share it with everyone helping you move. This ensures everyone is on the same page. Here’s a sample setup:
- Blue: Master Bedroom
- Green: Kitchen
- Red: Living Room
- Yellow: Bathroom
- Orange: Office
Hybrid Systems: Combining Room, Category, and Color
You don’t have to stick to just one labeling method. In fact, many people find the best results by creating hybrid systems that combine elements of different approaches. This allows you to customize your labeling to fit the unique needs of your move. A popular hybrid method combines room, category, and color.
For example, you could use a large colored sticker to denote the room (e.g., green for the kitchen). Then, you would write the destination room and a brief description of the contents or category on the box itself. This gives you the at-a-glance benefit of color-coding plus the detailed information from written labels.
This layered approach offers the best of all worlds. The color gets the box to the right room, and the written label tells you what’s inside. Tailoring your system this way provides maximum organization and makes the entire moving process smoother, from packing and loading to unloading and unpacking.
Essential Supplies Needed to Label Moving Boxes Properly
Your labeling journey begins with gathering the right tools. You don’t need anything overly fancy, but having a few essential supplies on hand will make the process much smoother and more effective. Think of this as your labeling starter kit, designed to keep your moving boxes organized and easy to identify.
From a good-quality permanent marker to colored stickers and clear packing tape, each item plays a role in creating a foolproof labeling system. Having these supplies ready before you start packing will save you time and help you stay consistent. Let’s look at the specific items you’ll want to have in your arsenal.
Permanent Markers and Waterproof Labels
A high-quality permanent marker is the cornerstone of any good labeling system. Opt for a marker with a fine or medium tip to ensure your writing is clear and easy to read. Black is a classic choice, but having a few different colors can be useful for creating visual distinctions between categories of moving boxes.
To find your items easily after a move, it’s crucial to write clearly and legibly on each box. Use your permanent marker to write the destination room and a brief summary of the contents on at least two sides of the box. This ensures you can identify the box’s contents no matter how it’s stacked.
Consider using waterproof labels or covering your handwritten labels with a strip of clear packing tape. This small step protects your labels from rain or smudging during transit. A label that is still readable after a long moving day is your best bet for a smooth unpacking experience.
Colored Stickers and Tape
Colored tape and colored stickers add a powerful visual punch to your labeling system. They are the key to an effective color-coding method, allowing you to identify the destination of your moving boxes at a simple glance. You can find these supplies at any office supply or craft store.
The process is simple: assign a specific color to each room in your new location. For instance, you could use blue for the bedroom, green for the kitchen, and red for the living room. Apply the corresponding colored sticker or a strip of colored tape to each box destined for that room.
This system is incredibly efficient on moving day. You can place a matching color marker on the door of each room. Movers and helpers can then quickly match the box color to the room color, ensuring everything ends up in the right place without needing to read a single label. It’s a simple but highly effective organizational hack.
Fragile Labels and Priority Tags
Some boxes require special attention, and this is where fragile labels and priority tags come in. For boxes containing delicate or breakable items, it’s essential to communicate their contents clearly to anyone handling them. You can buy pre-printed fragile labels or simply write “FRAGILE” in large, bold letters on all sides of the box.
Using red markers or tape for these warnings can also help them stand out to moving companies. This visual alert ensures that your fragile items receive the extra care they need during loading, transit, and unloading. Don’t forget to also mark “THIS SIDE UP” with arrows for items that must remain upright.
Similarly, designate a few priority boxes for items you’ll need immediately upon arrival. Mark these with “OPEN FIRST” or “ESSENTIALS” using a large tag or brightly colored label. This small step will make your first day in your new home much more comfortable, as you won’t have to hunt for your daily necessities.
Apps and Digital Tools for Tracking Boxes
For the tech-savvy mover, there are numerous apps and digital tools designed to simplify the labeling and tracking of moving boxes. These tools can help you create a detailed inventory list, track the status of your boxes, and even generate printable QR code labels. They offer a modern solution to the age-old challenge of staying organized during a move.
These apps allow you to log the contents of each box, often letting you add photos for a visual reference. When you need to find a specific item, you can simply search your digital inventory list to see which box it’s in. This eliminates the need for a physical notebook and keeps your inventory accessible on your smartphone.
Several popular apps can help with tracking boxes. While features vary, many offer tools to streamline your move. Some options you might explore include:
- Sortly: An inventory app that lets you create a visual inventory with photos and QR codes.
- Moving Organizer Lite: A simple app for logging box contents and tracking them by room.
- Box-Tracker: A dedicated moving app that helps you manage your box inventory from packing to unpacking.

Beginner’s Guide: How to Label Moving Boxes Step-by-Step
Properly labeling your moving boxes might seem straightforward, but a systematic approach can significantly reduce the stress of your move. Following a step-by-step guide ensures that you don’t miss any crucial details, making the entire moving process smoother from packing to unpacking. This is the best way to make sure you can find your items easily when you arrive at your new home.
This guide will walk you through everything you need to know about proper labeling. From gathering your supplies to maintaining a master list, each step is designed to set you up for success. Think of it as your roadmap to an organized, efficient, and less chaotic move. Let’s get started on your journey to becoming a box-labeling pro.
What You Need to Get Started with Box Labeling
Before you pack a single one of your moving boxes, it’s wise to gather all the essential items for box labeling. Having your supplies ready will make the process much more efficient and help you maintain a consistent system from the very beginning. You don’t need a lot, but the right tools make all the difference.
Think of this as your official labeling toolkit. These items will help you create clear, durable, and easy-to-read labels that will survive the move and make unpacking a breeze. Along with packing materials like bubble wrap and paper, your labeling supplies are a key part of an organized move.
Here are the basic supplies you’ll want to have on hand before you start:
- High-quality permanent markers (in black and a few colors)
- Colored stickers or tape for color-coding rooms
- Pre-printed “FRAGILE” labels or a red marker
- A notebook or smartphone for creating an inventory list
Step-by-Step Guide to Properly Labeling Moving Boxes
Now, let’s break down the process into simple, manageable actions. This step-by-step guide to proper labeling will ensure your moving boxes are organized, easy to identify, and ready for a smooth transition. Following these steps will make the unpacking process in your new space much quicker and less stressful.
By being methodical, you can create a labeling system that works for you, your family, and your movers. Each step builds on the last to create a comprehensive, foolproof plan for managing your belongings.
Step 1: Gather All Necessary Supplies
The first step in any successful operation is to prepare. Before you even think about packing your moving boxes, gather all the necessary supplies for labeling. Having everything in one place will prevent you from having to stop and search for a marker or tape mid-pack, which helps you stay in the zone and be more efficient.
Create a “packing station” with all your tools. This includes your permanent markers, colored tape or stickers, fragile labels, packing tape, and your notebook or smartphone for your inventory list. Don’t forget other packing essentials like bubble wrap, packing paper, and paper towels for cushioning.
By having your supplies organized and ready to go, you set the stage for a smooth and systematic packing process. This simple preparation step saves you time and frustration, allowing you to focus on the task at hand: getting your belongings packed and labeled correctly.
Step 2: Sort Items and Choose Your Labeling System
Once your supplies are gathered, it’s time to sort your belongings. Before items go into moving boxes, group them by category or by the room they belong to. For example, gather all your kitchen tools, group books from the living room, and sort clothes from the different bedrooms. This pre-sorting makes packing and labeling much more logical.
With your items sorted, you can now choose the labeling system that best fits your needs. Will you use a room-based system, a color-coded method, a numbered inventory, or a hybrid of all three? A room-based system is often the most effective for organizing boxes by room, as it directly tells movers where to place each box.
Whatever system you choose, stick with it to avoid confusion. Your goal is to create a clear and consistent plan that everyone involved in the move can understand. This is also the time to decide what will go in your “Open First” box, like a change of clothes and toiletries.
Step 3: Clearly Mark Every Side of Each Box
This step is a game-changer for finding things easily. Don’t just label the top of your moving boxes; mark at least two opposite sides of the box as well, in addition to the top. This ensures that you can read the label no matter how the boxes are stacked in the moving truck or in your new home. You’ll save yourself the hassle of unstacking a tower of boxes just to find the one you need.
Use your permanent marker to write in large, clear, bold letters. Your labels should be easy to read from a distance. Include the destination room and a brief, general description of the contents (e.g., “Kitchen – Glassware” or “Bedroom – Linens”).
For extra durability, consider placing a strip of clear tape over your handwritten labels. This protects the ink from smudging or getting wet if you encounter rain on moving day. A protected label is a readable label, and a readable label is your key to an organized unpacking process.
Step 4: Label Fragile and Priority Boxes Distinctly
Not all boxes are created equal, and your labeling should reflect that. It’s crucial to give special treatment to boxes containing fragile items and those you’ll need immediately. Use distinct, attention-grabbing labels for these priority boxes to ensure they are handled correctly by you and your moving companies.
For fragile items, use pre-printed fragile labels or write “FRAGILE” in big, red letters on all sides of the box. Add “THIS SIDE UP” with arrows for items that need to maintain their orientation. This clear communication is the best way to a-lert movers that the contents require gentle handling.
Similarly, make your “Open First” or “Essentials” boxes stand out. Use brightly colored tape, large stickers, or write “PRIORITY” in bold letters. These boxes should contain items you’ll need on your first day, such as toiletries, medications, and basic kitchen supplies. Making them easy to spot will be a huge relief when you arrive at your new home tired from the move.
Step 5: Maintain a Master List or Digital Inventory
The final step in a truly organized labeling system is creating a master list or digital inventory. This is especially important if you’re using a numbering system for your moving boxes. Your inventory list is your central command center, detailing the contents of the box for every number.
You can create this list in a physical notebook, on a spreadsheet, or by using one of the many moving apps available. For each box number, record the destination room and a more detailed list of its contents. This level of detail is invaluable when you’re looking for a specific item and can’t remember which box it’s in.
This master list serves another important purpose: it’s a crucial document for insurance purposes. If any of your boxes are lost or damaged during the move, your detailed inventory list provides a clear record of what was inside, making the claims process much smoother. It’s a little extra work that provides a lot of security and peace of mind.
Conclusion
In conclusion, labeling your moving boxes properly is essential for a smooth and stress-free relocation. By adopting efficient labeling systems such as room-based labels, color coding, and inventory lists, you can simplify the unpacking process and minimize the risk of losing items during the move. Taking the time to clearly mark every box and prioritize fragile items ensures that your belongings are handled with care. Remember that a well-organized move not only saves you time but also reduces the anxiety often associated with moving. If you need further assistance or have questions about the best labeling methods, feel free to reach out for a consultation!
Frequently Asked Questions
What is the best way to label moving boxes for easy unpacking?
For easy unpacking, label boxes on multiple sides with the destination room and a brief content description. Use a color-coding system for quick room identification and maintain a numbered inventory list to track specific items. Designating “Open First” boxes for essentials will also make your unpacking process much smoother.
How should I label boxes with fragile items?
To label fragile items, write “FRAGILE” in large, bold letters on all sides of your moving boxes. Use pre-printed fragile labels or red markers to make them stand out. Also, add “THIS SIDE UP” with arrows to ensure they receive extra care from moving companies and are not turned upside down.
Should I list contents or use numbers on moving boxes?
A hybrid approach works best. Write the destination room and box number on the outside of your moving boxes. Then, keep a detailed list of the contents of the box on a separate master list or digital inventory. This keeps your boxes organized while keeping the specific contents private.